
用生活中常见的小用品就可以做出这样温馨可爱的墙饰,如果配上钟芯它还是一款不错的挂钟哦!
材料:竹叉、 泡沫杯垫、涂料、蝴蝶装饰
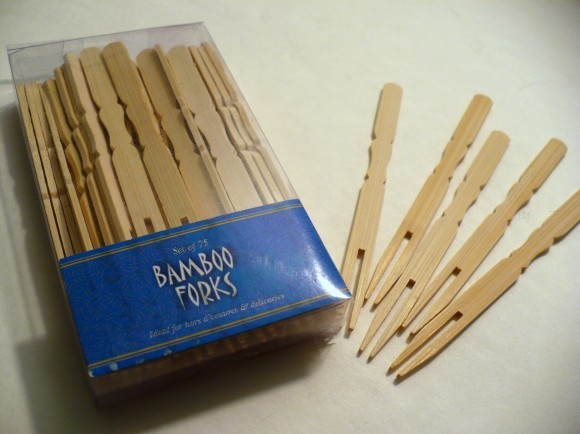
在农贸市场买来的一次性餐具,你可以买类似的材料来制作哦~
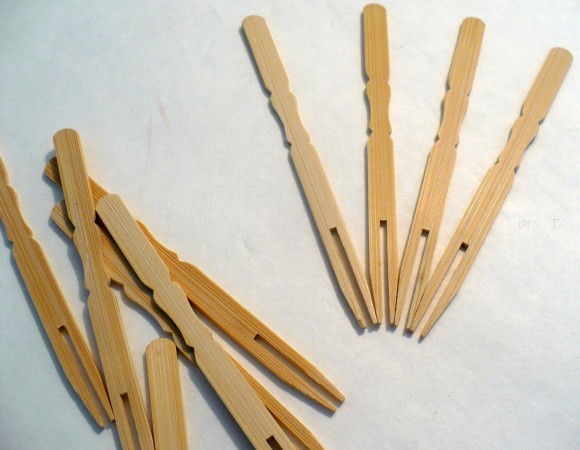
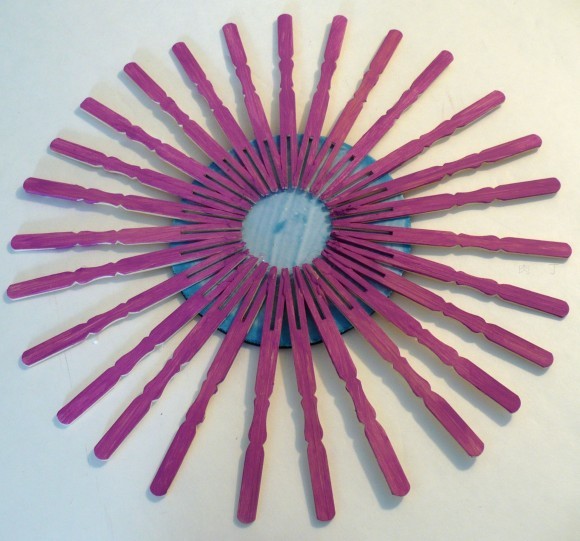
摆成对称的发散状

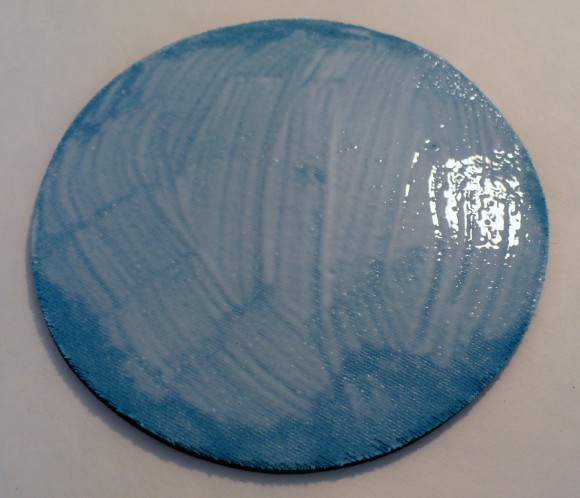
染色

用厚纸板涂抹胶水,做底盘

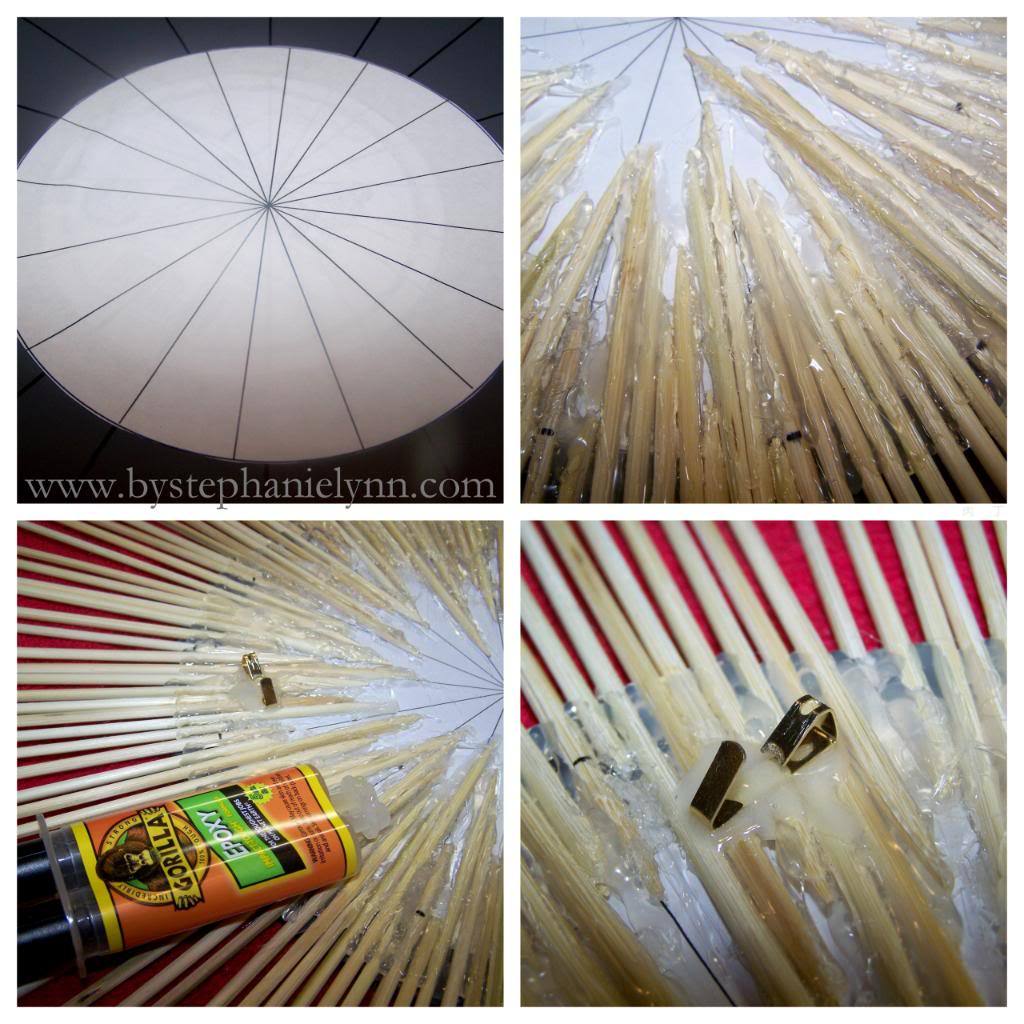 I used the same steps in the original tutorial I posted {here}. You just need a round mirror, wooden skewers, this template, and lots of hot glue. The round mirrors are actually candle plates and can be found in many different sizes. I also stumbled across a pack of 7 round mirrors at Ross a few weeks ago for $10 and happen to also see them at Target for $20 {you can find them here}.The back of the mirror looks like a hot mess with the abundance of glue, but I will say the original mirror I made {back in November 09} is still in tact and has even survived being dropped.
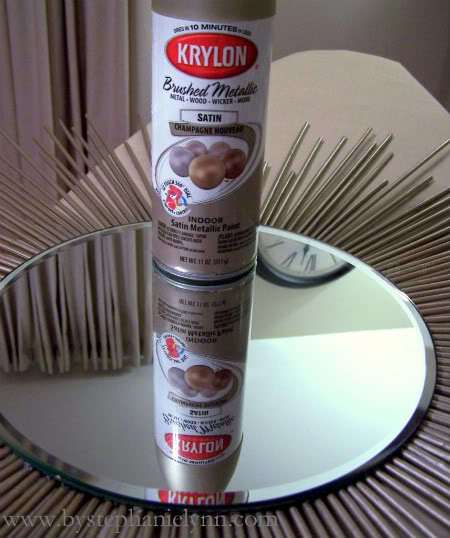 This set of three received a coat of one of my favorite new colors - Krylon Champagne Nouveau. It is the perfect blend of satin nickel and champagne gold.
 I varied the patterns a little on each mirror simply by cutting the skewers different lengths and arranging the patterns just a bit as I glued the sticks in place. {If you use the template above - once you have the sixteen main skewers glued, you can fill in the empty spaces with whatever pattern you like}
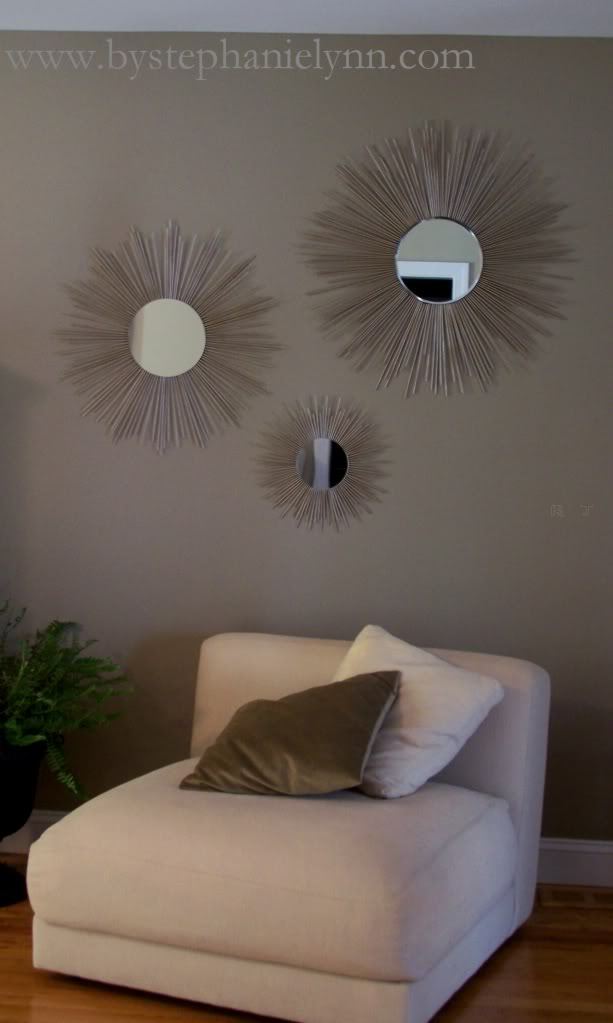
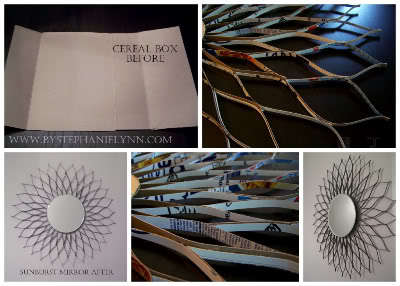
 I began by taking two cereal boxes apart and cutting off the top and bottom tabs leaving a rectangle.
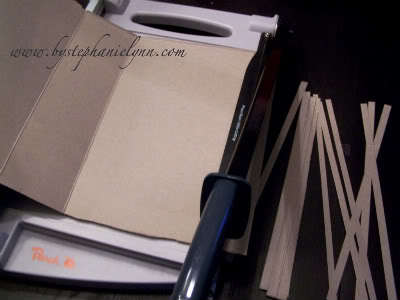 Using a paper cutter I cut the cardboard into 1/4 inch strips.
 The first {inner} layer of the sunburst was made from 29 strips. Each strip was folded and hot glued as shown above. Bend each strip in half and dap a little hot glue on the 'open' end to form a teardrop. Flatten the 'loop' side and dab a little hot glue in the crease to form a 'point'. Holding both ends 'puff' together to create an eye shape.
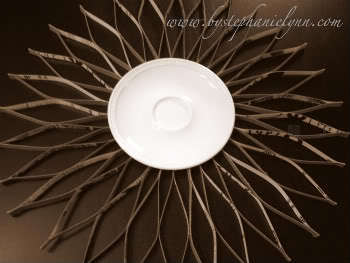 Using a teacup saucer as my guide, I laid out the first layer.
 Once I had everything evenly spaced and aligned I dabbed a tiny bit of hot glue onto the touching part of every piece to hold in place. {as shown above}
 For the second layer, I altered the folded strips just a bit as shown above. Taking another 29 strips; I folded each in half, hot gluing the crease together to create a point. This layer is actually glued in-between the first layer pieces. To do this I ran a bead of hot glue down each outer side and slid into place as shown below. {creased side pointing out}
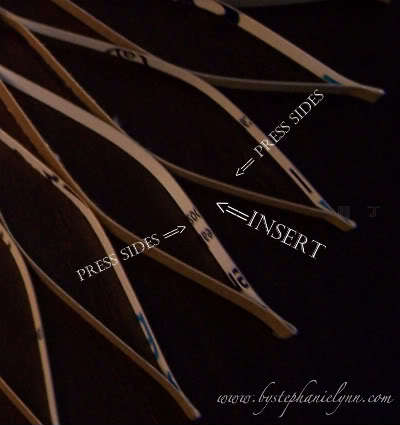 As you work your way around the entire edge, gently press the glued sides together to assure a good firm hold. {You're basically just filling in the spaces}
 I added a third layer using the same techniques as layer two.
 Once the sunburst shape was complete I cut a circle out of a piece of cardboard and hot glued it to the center. {I squirted on a lot of hot glue and let it drip in the creases to ensure a good strong hold}
 Next was paint. I used several very light coats of regular spray paint to cover the cardboard. I used a combination of grey flat primer and a dusting of satin nickel.
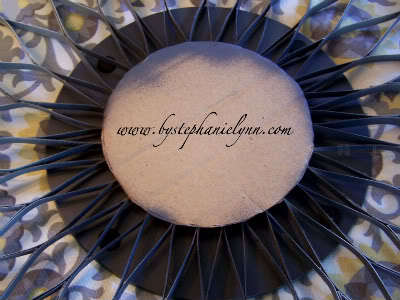 Once dry, I was ready to attach the mirror. I used a 10 inch round mirror that can be found in many craft stores in the candle section {they are actually candle plates and run approximately $3.99}
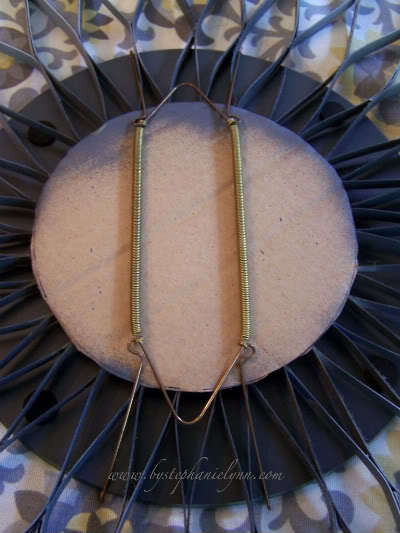 I simply used a plate hanger to attach the two together. The springs do a good job of holding it in place. {I did not use any glue}
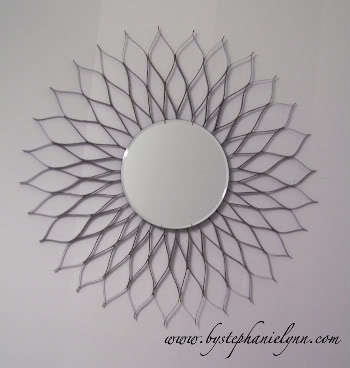 The finished mirror measures a total of 28 inches in diameter.
 I love it just as much as the first one; if not more!
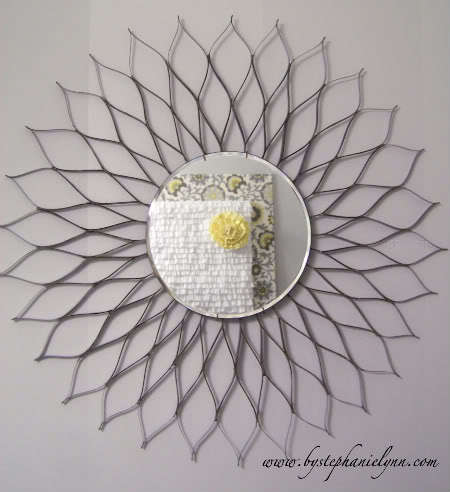 It is going to go in my powder room that I am finally getting around to finishing. I know, I teased you last month with the crepe streamer ruffle board and fabric {found here}, I just get into too many projects at once! I have a few more final touches to add to be able to check this room off my list! Enjoy!
